Search
[wpdreams_ajaxsearchlite]
AVSnap offers up to 10 layers per page. Each layer can be marked as Visible, Printable or Editable. Two additional features allow users to highlight objects in a specific layer or to select all objects in a specific layer.
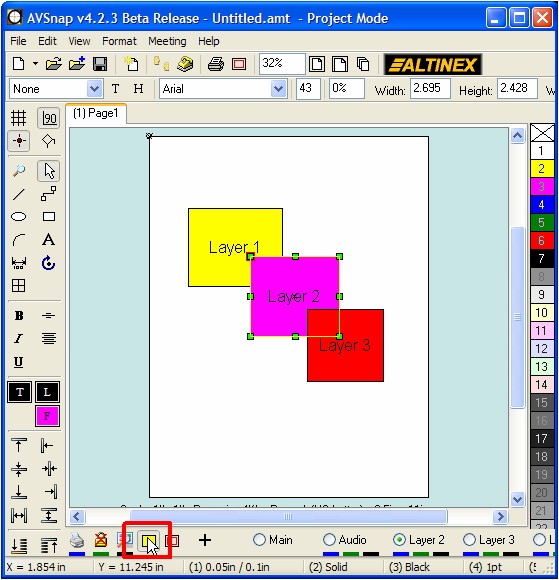
Step 1: Draw three rectangles, fill them with different colors, and add text to each one of them. Notice that all objects are located on the Main Layer.
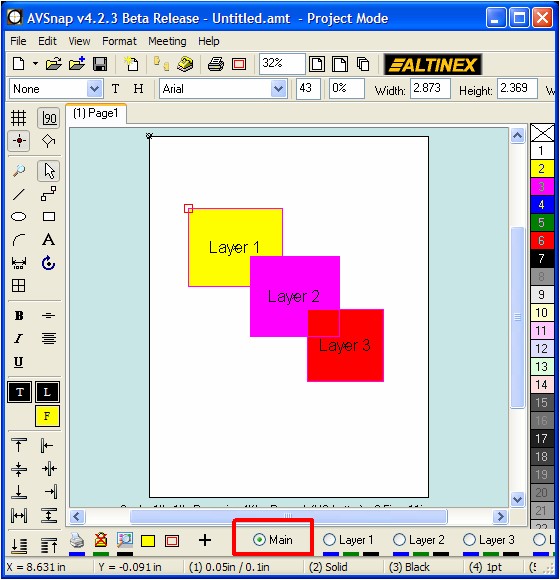
Step 2: Select the yellow rectangle only and click on Layer 1. Then select the magenta rectangle and click on Layer 2. Finally, select the red rectangle and click on Layer 3.
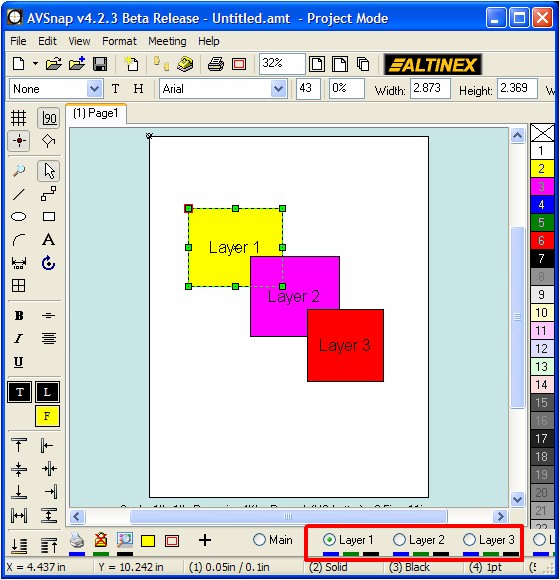
Step 3: There are 3 bars below each layer. The blue bar is for printing enable/disable. The green bar is to enable/disable locking the layer. The black bar is for making the layer visible or invisible. These bars correlate to the icons on the left hand side.
![]()
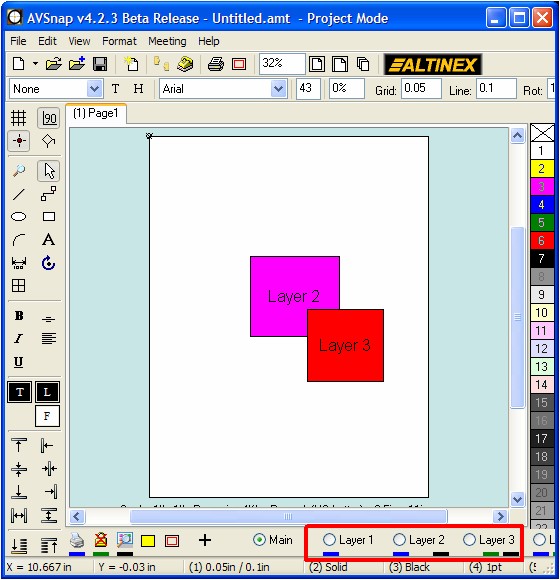
Step 4: You can click on the Icons on the left side or on the bars below each layer to make changes for each layer. The image below shows Layer 1 is invisible, locked, but printable, Layer 2 is locked and Layer 3 is not printable. Usually, when a layer is marked invisible, the same layer will automatically be locked.
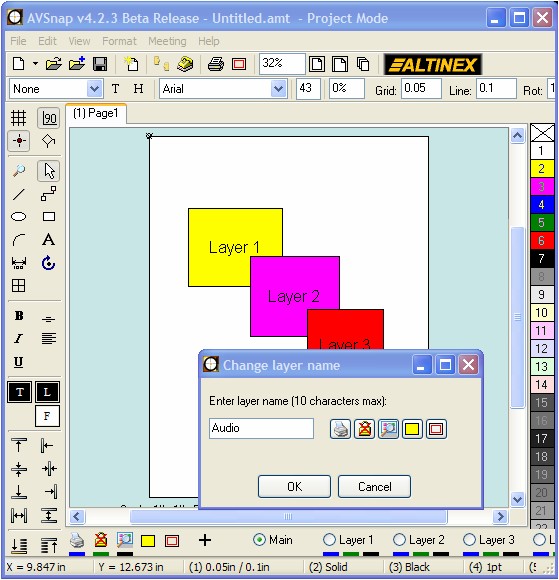
Step 5: It is easy to re-name layers. Each name can have up to ten letters. Right mouse click on the layer name and enter a new name.
Step 6: To highlight object(s) in any layer, first select a layer and then click on the highlight button. The object located on that layer will be highlighted in yellow.
Use layers when you need to apply a floor plan to a project or when you want to make specific objects non-movable to serve as a background to your drawing.
Want More Help?
Get Your Free Copy of AVSnap Now
Save Your Time And Effort And Start Using AVSnap To Control Your AV System
