Search
[wpdreams_ajaxsearchlite]
AVSnap has a built-in Flowchart mode. In this mode, users can easily create different flow chart symbols using the Rectangle, Ellipse and Cable drawing tools and then create any type of flowcharts.
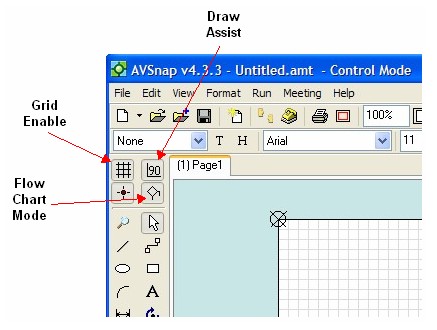
Step 1: Start AVSnap and click on the “Flowchart mode” tool button. Then, enable the Grid and Draw assist features. This will help you keep your flow charts neatly organized.
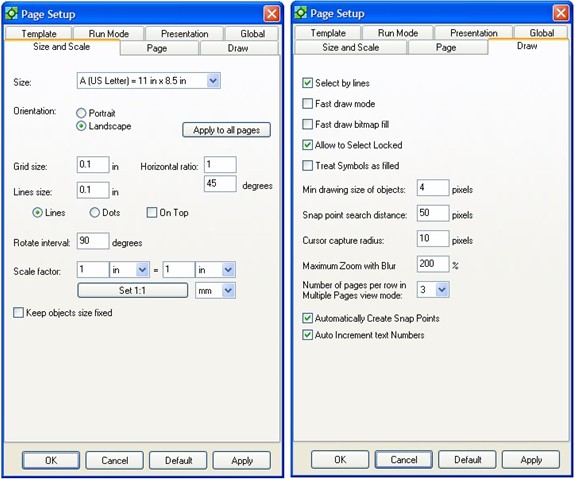
Step 2: Configure Page Setup as shown. Remember, Flowchart mode is configured separately for each page. So if you are going to have flow charts over multiple pages, make sure to configure all pages the same for a consistent look. Note that Grid size and Line size are set to the same value.
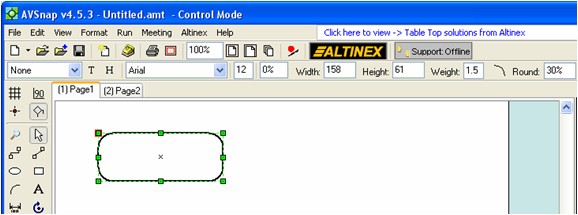
Step 3: Draw a rectangle with rounded corners. This rectangle will be converted to a Flowchart object in the next step.
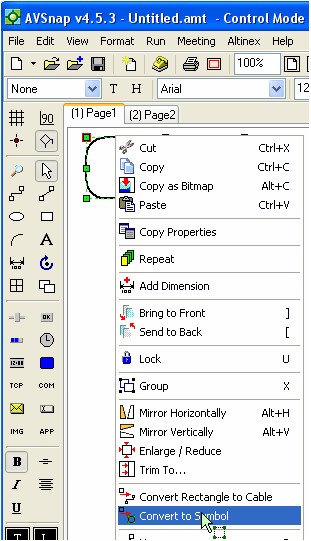
Step 4: Right click on the rectangle and select the “Convert to Symbol” menu option.
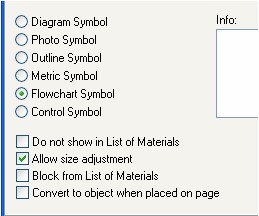
Step 5: Double click on the newly created Flowchart symbol and checkmark the “Flowchart Symbol” radio button. Once this is done, you can double click on the Flowchart symbol and type in text as needed.
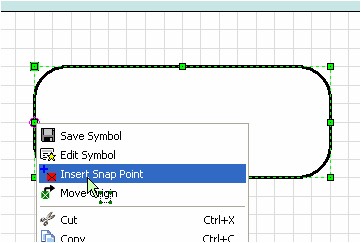
Step 6: The next step is to add snap points so that Flowchart knows how to route the connections automatically. Make sure that the Grid is enabled so that snap points are on the grid and are aligned. Right click on the symbol in the desired location as shown in the example below and select “Insert Snap Point”.
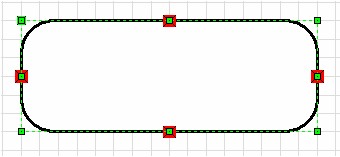
Step 7: Repeat this process on all four corners to allow Flowchart connections for each side. Snap points can be added or deleted as needed on a symbol.
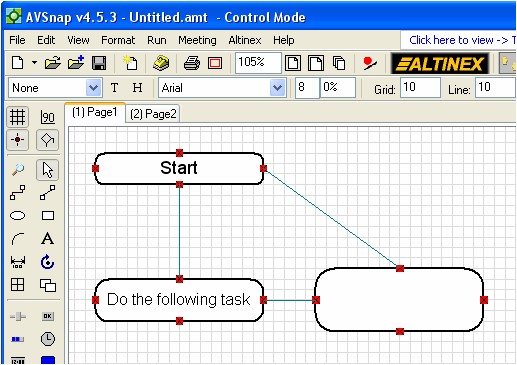
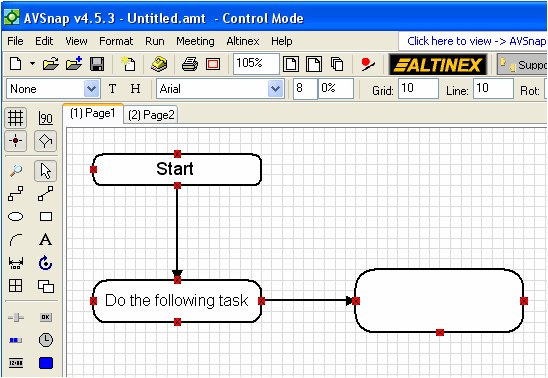
Step 8: Now that we created a flow chart symbol, we can add it to a library or copy/paste it to create a full flow chart. You can also adjust the symbol size to fit all of the text as needed. Notice on the page that AVSnap is trying to automatically connect to the snap points in anticipation of completing the flowchart.
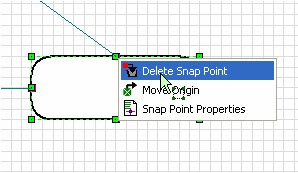
Step 9: Remove snap points that you do not want to route by right clicking on a snap point and selecting “Delete Snap Point”.
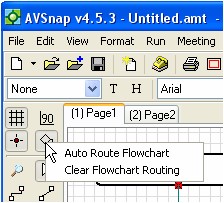
Step 10: Once everything is completed, select to automatically route the flow chart. Of course the flow chart can be routed manually if desired. Right click on the Flowchart tool bar and select “AutoRoute Flowchart”.
If the cable is set to default with arrows, then arrows will be automatically inserted.
AVSnap provides a complete facility to design simple and complicated flow charts. In addition to using drawing components, AVSnap also allows the use of symbols from libraries. Additionally, any object can be converted to a symbol and additional snap points can be added for easy connections in flowchart mode.
Want More Help?
Get Your Free Copy of AVSnap Now
Save Your Time And Effort And Start Using AVSnap To Control Your AV System