Search
[wpdreams_ajaxsearchlite]
AVSnap provides a 1 and 2 bend Cable tool that simplifies routing and connections between symbols and components. Using these tools greatly increases design speed and simplifies cable alignment. The new 1 and 2 bend Cable tool replaces the Line tool. As of version 4.5.1, Line tool is no longer available and is not supported.
Step 1: Open AVSnap and the “MultiTasker Diagrams” symbol library.

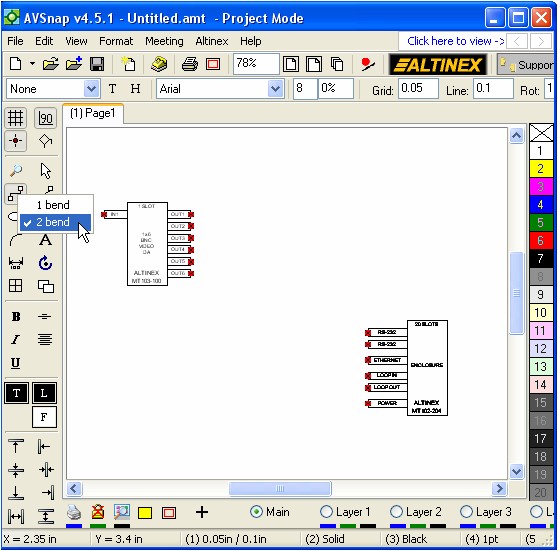
Step 2: Place two symbols on the page. These symbols will be used to show the functionality of the 1 and 2 bend Cable tool. Select the 2 bend Cable tool from the left tool bar.

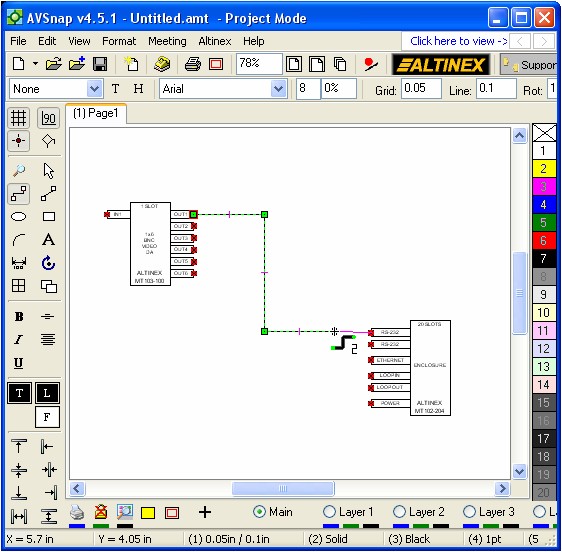
Step 3: Now, draw a cable from the left symbol to the right symbol. Since the DrawAssist function is enabled, AVSnap will guide you by showing which pin it is trying to connect to. Notice that the cable already has 2 bends in it as you drag the cable from one symbol pin to another.

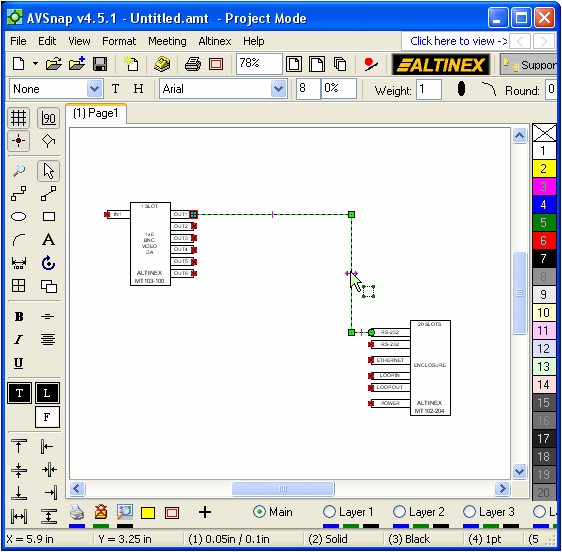
Step 4: Use the Draw assist function and drag the vertical segment to the right.

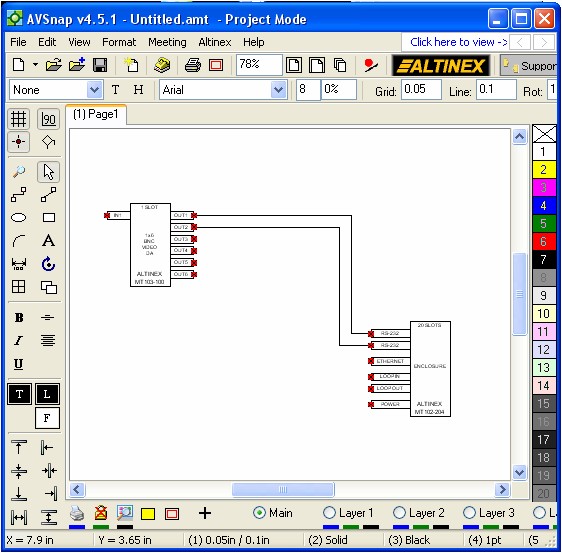
Step 5: Now, add another cable using the same technique. If you need only one bend in the cable, then use the 1 bend Cable tool.

The 1 and 2 bend Cable tools provide additional flexibility in designing AV Systems using the AVSnap software. The new tools provide improved efficiency and speed of design. The new tools are also very smart. If you start drawing cables to the right or left, it will draw the first line horizontally. If you start drawing cables up or down, it will draw the first line vertically. To change the orientation of the cable during the drawing process, use the TAB key.
Want More Help?
Get Your Free Copy of AVSnap Now
Save Your Time And Effort And Start Using AVSnap To Control Your AV System
